

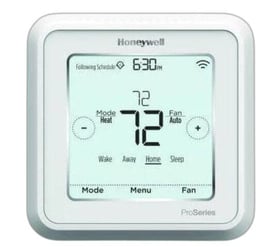
A Honeywell thermostat is an essential part of your home’s heating and cooling system, ensuring comfort throughout the year. However, if your thermostat starts displaying a low battery warning or stops working properly, it may be time to replace the batteries.
Follow these simple steps below to get your thermostat back up and running:
How to Replace the Batteries on Your Honeywell Thermostat
Step 1: Identify Your Honeywell Thermostat model
Before replacing the batteries, you need to determine your thermostat model. Honeywell thermostats come in various designs, including:
-
Battery-powered models (require batteries to operate)
-
Hardwired models with battery backup (use batteries as a backup power source)
 Common Honeywell models that require batteries include:
-
Honeywell 5000 Series
-
Honeywell 6000 Series
-
Honeywell 8000 Series
-
Honeywell VisionPRO Series
Check your thermostat’s manual or look for a model number on the device itself to ensure you’re using the correct battery type.
Step 2: Gather the necessary tools and batteries
For most Honeywell thermostats, you’ll need:
-
AA or AAA alkaline batteries (Check your user manual for specific requirements)
-
A soft cloth or dry towel (to avoid leaving fingerprints or damaging the unit)
Avoid using rechargeable batteries, as they may not provide a consistent voltage.
Step 3: Remove the thermostat from the wall
-
Turn off your HVAC system – While not always necessary, it’s a good precaution to prevent potential electrical issues.
-
Gently pull the thermostat cover or body – Many Honeywell models are attached via a snap-on design. Carefully pull from the bottom and lift the thermostat off its wall plate.
Step 4: Replace the batteries
-
Locate the battery compartment – On most models, the battery compartment is found on the back of the thermostat unit.
-
Remove the old batteries – Pay attention to the positive (+) and negative (-) orientations before taking them out.
-
Insert new batteries – Ensure they are properly aligned according to the markings inside the battery compartment.
Step 5: Reattach the thermostat and test
-
Snap the thermostat back onto the wall plate – Align the pins on the back of the thermostat with the connectors on the wall plate and gently press it into place.
-
Turn your HVAC system back on – Check to see if the thermostat powers up and displays the correct settings.
-
Confirm functionality – Adjust the temperature settings and ensure your heating or cooling system responds accordingly.
When to Replace Your Honeywell Thermostat Batteries
-
Honeywell thermostats typically require battery replacement once a year.
-
A low battery warning will usually appear on the screen 2 months before the batteries fully drain.
-
If your thermostat is unresponsive or keeps resetting, weak batteries may be the cause.
Need Extra HVAC Assistance?
If replacing the batteries doesn’t resolve your thermostat issues, there may be a deeper problem with your HVAC system. Our professional team in Philadelphia is here to help! Contact us today for expert thermostat troubleshooting and HVAC services. By following these simple steps, you can keep your Honeywell thermostat running efficiently and maintain comfort in your home year-round!

If you live in the Delaware Valley/Greater Philadelphia area and would like to find comfort within your home, visit our website or give us a call at 215 - 245 - 3200 to learn more.

